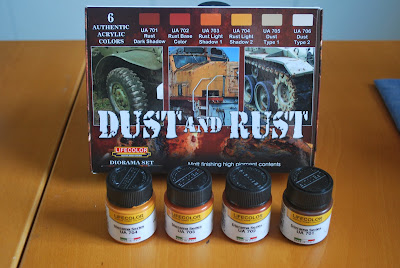
One of the things that always bothers me in my tank-models is the state of the tracks. I tried painting them grey mixed with steel for newer tracks, or covered them with mud to avoid/hide the issue altogether. This - and weathering in general - is the main reason why I consider none of my current tank-projects "finished".
Some time has passed, some Youtube videos were watched and some new products magically found their way to the bench. Time to bite the bullet, at least where tracks are concerned.
Lightly rusted tracks
For the T-34, I wanted lightly rusted tracks. The tank in Skierniewice obviously has been painted over at some point, because none of the surfaces or parts that are particularly susceptible to wear and tear show any signs. Even the exhausts are pristine green, while they would be the first to lose the paint and start rusting.
 |
| Only moderate rust stains on the tracks here |
 |
| No rust or wear-and-tear whatsoever on the exhausts |
Heavily rusted tracks
For the T55, I wanted heavily rusted tracks, indicative of a vehicle that hasn't moved in years (or decades).
For this, I purchased Lifecolor's set Dust and Rust, because I read only good things about them. Michael Rinaldi uses them and uncle Night Shift demonstrates his use in this video, which explains it 10 times better than I can describe with words here.
(paint is heavily thinned 20/80 with tap water)
- 1 heavy layer of color #1, including speckles
- several lighter layers of color #2, with speckles
With "lighter" I mean: not slapping it on to try and get full coverage, but apply sparingly and re-apply where needed after the first has dried. - 1 light coat of #3, with speckles
- 1 extremely light (thinned 5/95) coat of #4, with "normal" speckles
- another light coat of #3 to try to blend it all together
- another round of speckles with #1


No comments:
Post a Comment