Showing posts with label Airbrush. Show all posts

Sunday, 13 September 2020

Challenger - Painting

A new airbrush, new paint, either we'll be reaching new levels of airbrush mastery or new levels of frustration.

The first try with MRP paint was a very satisfying experience, paint-wise. The Aztec airbrush still leaks after a few minutes, especially with these hyper-thinned paints.

BUT: now I have a NEW airbrush, an Iwata HP-C Plus, which came highly recommended. I probably should have bought this years ago, but a combination of being a cheap bastard and a lot of self-doubt kept me from it. As a matter of fact, it kept me from the bench for almost two years.


The Challenger II now has a nice coat of Olive Drab. MRP is a dream to work with and the smell isn't half as bad as I had feared.
I'll post these 2 pictures, just because of the huge difference lighting makes on the color in a photo.


Out come the thrustworthy silly putty and Tamiya tape to mask this cow's spots. (I jokingly called it a green cow and now the thought is stuck in my head)

On the front half, I masked off all surface area to be kept green. 
On the back half, I only used putty to mark the spots. Not having to mask the entire surface would save time in masking and be an exercise in airbrush control. Up to a point, this was succesfull, but I did get some overspray around the edges of the putty. They were easily touched up again with some OD, but it's a constant reminder that patience is not my strongest point.

Next time (I  might give the Panzerjägerwagen another try), I'll try to do it freehand without any masking at all, but in the end the extra time taken in airbrushing ever so slowly might take longer than the time needed to do some basic masking.


Friday, 21 August 2020

Airbrushing update - Mister Paint

I tend to "occasionally" grumble about airbrushing not going the way I want it, but it's been a long time since I truly updated on any change or progress.

Thinner = better!

For the last few sessions, I had to thin the paint really heavily so I could mist on fine layers of paint to build up to a certain effect. I experienced less issues than normal, except for one NEW problem. (keep reading)

Now, you know I mainly use Vallejo Model Air (which is already frowned upon by many) and I thought I was already thinning the paint enough (who really knows the consistency of 2% milk anyway), but clearly thinner than usual was better. (By no means, I hold any credence to spraying this from the bottle as some seem to be able)

With the paint this thin, I could paint for almost half an hour, during which I did 3 colour switches. Only after the 4th colour (yellow), I could clearly see that it was contaminated with the previous (black) colour, so something went wrong.

Thinner = leaky?

It was at this point - stepping away from the model -  that I noticed my fingers were also black and - as a matter of fact - the entire airbrush was black.

I took it apart, cleaned it thoroughly and set up for the next session, which followed roughly the same pattern. The Aztek paintbrush leaks with this superthin paint, just when I though I had found the correct consistency of said paint.

If I remove the nozzle, the thread is not painted, so that's not where the paint is getting through. I can only deduce that the paint is finding it's way through the "plunger"-thingie that moves the needle (Aztek has a very unique design) and into the body of the brush. Since the body consists of 2 halves just press-fitting together, the paint leaks out through the seam. (see picture where the paint oozes out ever so slowly).

Maybe I'm missing a seal somewhere ...


Friendly advice

I went on a rant on Facebook, finally convinced that I needed a new and better airbrush. The reason I hadn't taken that step until now is because the Aztek was "good enough", I didn't want to spend the bucks on it and a major factor may also have been analysis paralysis, not even knowing which one I should choose anyway.

The group helped to calm my tense nerves and convinced me not only to buy a new Airbrush, but also to try out a different paint, because "I would not regret it". The choice here seemed to unanimously go towards MRP or Mister Paint.

Mister paint = awesome!

I found MRP available in 1 online shop that is relatively close, so I bough just 2 colours, to try it out on the Challenger.

They arrived quickly. I noticed the hyper-thinned state of it and gave it a try. IT MAKES A WORLD OF DIFFERENCE!

It sprays fantastic. I do not need to worry about overthinning the paint so it isn't paint anymore. I feared it would take longer to dry and would take a gazillion of layers to fully cover a subject, but the paint dries in front of your eyes, just by the flow of the airbrush. The thinner evaporates within seconds, so I can go over it for a second and third layer and so on.

The only drawback I can figure - if really forced to - is that a bottle of highly thinned paint runs out a lot quicker than a bottle of a thicker paint that you need to thin yourself. Strictly speaking, that means you get less surface covered for the same price, making MRP more expensive. But it's totally worth it.
Also - to put it in perspective - I used the better half of the OD (olive drab) bottle on a complete 1/35 tank. It's not like I needed an extra bottle.

Of course, the Aztek is still a leaky bucket, but I know that's not the paint's fault.

New airbrush coming in 5, 4, 3, 2 ... 1 week.


Sunday, 14 June 2020

PL-01 - Colour modulation

I promised I'd try a hand at colour modulation, because I found the all-grey, little-surface-detail PL-01 too bland.

There are several techniques and an insane amount of videos on this topic. Because the base-coat was already there, pre-shading wasn't an option, so I decided to go over certain spots with a lighter version of the base-coat and others with a darker. I guess this technically qualifies it as post-shading.
When it's all done, I will also try with oils to see how easy that would be to achieve the same result.

The trick here is to go very slow, with translucent layers, and build up an effect. That means highly thinning your paint before you spray. In the past I experienced issues with just thinning paint in a ratio of  e.g. 10:1 (10 parts thinner to 1 part paint), where it would either not spray properly from my airbrush, or too quickly or the paint would spider.

My reasoning was I though I remembered reading somewhere that if you thin paint TOO much, it loses whatever quality makes it stick to the surface and it becomes a loose gathering of floating pigments instead.

So I decided to try a few different products.

Glaze medium

Sounds like something you'd thin paint with, but it's clearly meant for brush-painting figures. It's super-fluid, finds all nooks and crannies and flows there. Stays wet very long.

→ Not good.
Varnish (satin)

In a ratio of roughly 5:1 (varnish:paint) this sprayed just like I expected. Could have gone thinner for even more control over the effect.

→ Acceptable
Transparator

A product by Ammo specifically for thinning paint beyond the point where it is no longer considered paint. It sprayed iffy. I'm also more inclined to put it in the brush-painting section.

→ Meh
At this point, I was no longer sure wether my spraying issues were product-related or airbrush-related, so I decided to give it a good strip & clean to be sure. There was a lot of dried paint and gunk in the body, which can't really improve it's functioning.

Airbrush thinner

As a last resort, I tried again with my default thinner. Stripping and cleaning the airbrush must have done something, because trigger control was flawless and because this thinner evaporates very fast, you can go over the same spot only seconds later. The airflow of the airbrush is enough to dry the surface.

→ OK!
So, I guess I'm back to the same old product, just learned to clean the airbrush better or more often and keep tight on the trigger-control.

Ah yes, the result!

I used a lighter tone around panel lines (where the angle changes), on flat top pannels, the top-left quadrant of the gun barrel and several oddly-angled surfaces. Darker tones around the turret ring and towards the lower part of the side skirts.


Thursday, 20 October 2016

Dare to try

Hmm, no posts in 3 months? Somebody's been a bad boy!

What have I been up to? Painting the Merkava (and halting just before the weathering step), building the T-55 (no paint yet) aaand ... not much else. Don't worry, it's just another modelling hiatus. It happens.

I'm painting a hockey mask for Halloween. Getting re-acquainted with the airbrush and it went from wonderful to really bad, just like I remembered. Then the trigger started to jam and it was all over.

Last time this happened, I sent it to the States for a cleanup. No way was I to open it up myself or void the warranty. Scared little weasel that I was, I complied. Well, they did clean it up and sent it back, so I'm grateful for the excellent (free) service. But it did get lost in transit for a couple of long, scary weeks.

Anyway, when it returned all squeaky clean, I could see where they had pried it open (voided warranty, my @ss), so when it was time for another cleanup, I just bit the bullet and opened it up.
It just pries open from the back to the front. It doesn't look too complicated, but I was precautious and took a picture before complete disassembly.

Some acetone and some elbow grease and it looks shiny as new. Well, no, but all the gunk is gone. And there was a LOT of gunk.

It's now drying. I haven't tested it yet, but I'm confident. (famous last words?)


Here's the mask I'm painting. It's a $2 white hockey mask, that I attacked with sanding paper, a dremel, black primer, german grey and a thick coat of matt varnish.

Next up : heavy chipping fluid and aluminium. Then the actual chipping and a black wash.


Wednesday, 8 July 2015

Lost and found

         - Great service! Garbled communication.

Grab a snack and sit down for my latest horror-story, with a happy ending!

About 6 weeks ago, the airbrush broke down on me. The trigger was no longer moving the needle. In the past, that was caused by the needle being stuck in the nozzle, but this time something was stuck in the interior of the airbrush, conveniently placed in an unreachable place. (the needle-thingie in the second picture).

I managed to soak it up a bit and clean out the worst, to get it moving again for one more session. A week later however, there was no more persuading it to move.


So, I was faced with a dilemma : 1) break it open, voiding the warrant, and potentially screw up, or 2) send it accross the Atlantic, potentially never seeing it again. (The trust in postal services is strong in this one).

Even though I bought it second-hand, Testors support (now "Rust-Oleum Product Support") said the lifetime warranty was still applicable and I could just send it to them for clean-up or replacement. Sending it accross the world in a secure way costs about twice what the airbrush is worth, so I opted to send via regular mail, but with Track-and-Trace. Yeah right, track ... no trace.

The first and last "trace" on the tracking page was the package leaving Brussels. Then ... nothing. 1 week, 2 weeks, 3 weeks ... starting to worry now. Contacted postal services, who confirmed something had gone wrong with the processing of the tracking numbers, but they would fix it. A couple of hours later, it shows up as "Return to sender. Address unknown." (can't get this song out of my head now :-)). I was sweating all sorts by then, but luckily - 2 days later - it showed up as "Delivered".

I contacted Testors .... nothing recieved, sorry. Back to postal services. And ping-pong from there.
It's now 3 weeks after the supposed arrival of the package, nothing from Testors, postal services are "looking into it", so I was starting to become convinced I was one of the lucky ones with another "cool story" about the horror of postal services. If only I had just cracked it open and cleaned it myself...

WHEN SUDDENLY!

A package arrived, with my thoroughly cleaned, good as new airbrush. I will be giving it a test-run tomorrow. I sent a message to Testors, thanking them for their service and asking how the hell they got it this clean, unless there's a secret to cracking it open without voiding the warranty?

I will sleep better this night!


Sunday, 28 December 2014

Viper - Part 5 (Base coat)

Last time, I primed the Vipers. Now it's time for their basecoat.

For the Mark II, the white primer coat IS the base coat, but I've hit a snag with the tail-section and it requires more filling and sanding before I continue.
The Mark VII was primed in black, which has 2 reasons. One, it's super-easy paint (easier then the grey and white primers I have), which covers the model beautifully and makes further painting a breeze. Two, it's the basecoat for pre-shading.

The 2 pictures below illustrate my current method without the need for words. Matt over at Doog's models calls it "Black basing" and you can find his detailed explanation here.

Super-simplified, it goes as follows :

  1. Prime the model in black
  2. Fill in all panel centers with the basecoat. (first picture)
    Don't cover the panels too evenly.
  3. Go over it with a thinned version of your basecoat (second picture), to blend the panels and the remaining black "panel lines" and unify everything.
    Important : stop painting 2 or 3 passes before you think you'll reach adequate coverage, or the contrast will be gone. It's easier to add another layer later, than to regret going too far.
The result is a not as monochromatic than if you were just slapping on an entire coat in the same colour and colour density. It's only the second model on which I try it, but I'm liking the results.


Friday, 26 December 2014

Viper - Part 4 (Back at the bench)

Finally vacation! Time to kick some postponed projects in high gear. Lack of posts does not mean lack of progress, although I admit it's going slow and the number of hours at the workbench are fewer than I'd like.

All the minute photo-etch details have been added to the Panzerjäger's turret skirts, but that project has temporarily made way for a renewed intrest in the double Viper build, abandoned somewhere in august.


I messed up the Mark II's cockpit a bit, with some overenthusiastic aluminium overspray on the inside. I'm not even sure how I managed to do that. I wetted a cloth with some airbrush cleaner, and with a little persuasion the paint came off. Not all of it, but enough to make it presentable again. I then sealed it in several layers of Future.

The cockpit was attached with canopy glue, something I picked up at the hobby shop on a recent shopping spree. It requires force to be exerted while drying and is best left alone for 24 hours to fully cure. (The bottle says 3 hours before "handling", but safe trumps sorry anytime)
I used to same stuff to fill the large gaps around the canopy, because the fit left a lot to be desired. It's thick enough to fill big gaps and cleans up easily with a wet cotton bud. It dries as good as transparent, so any excess glue that oozes out on the inside of the canopy should hardly be visible. 


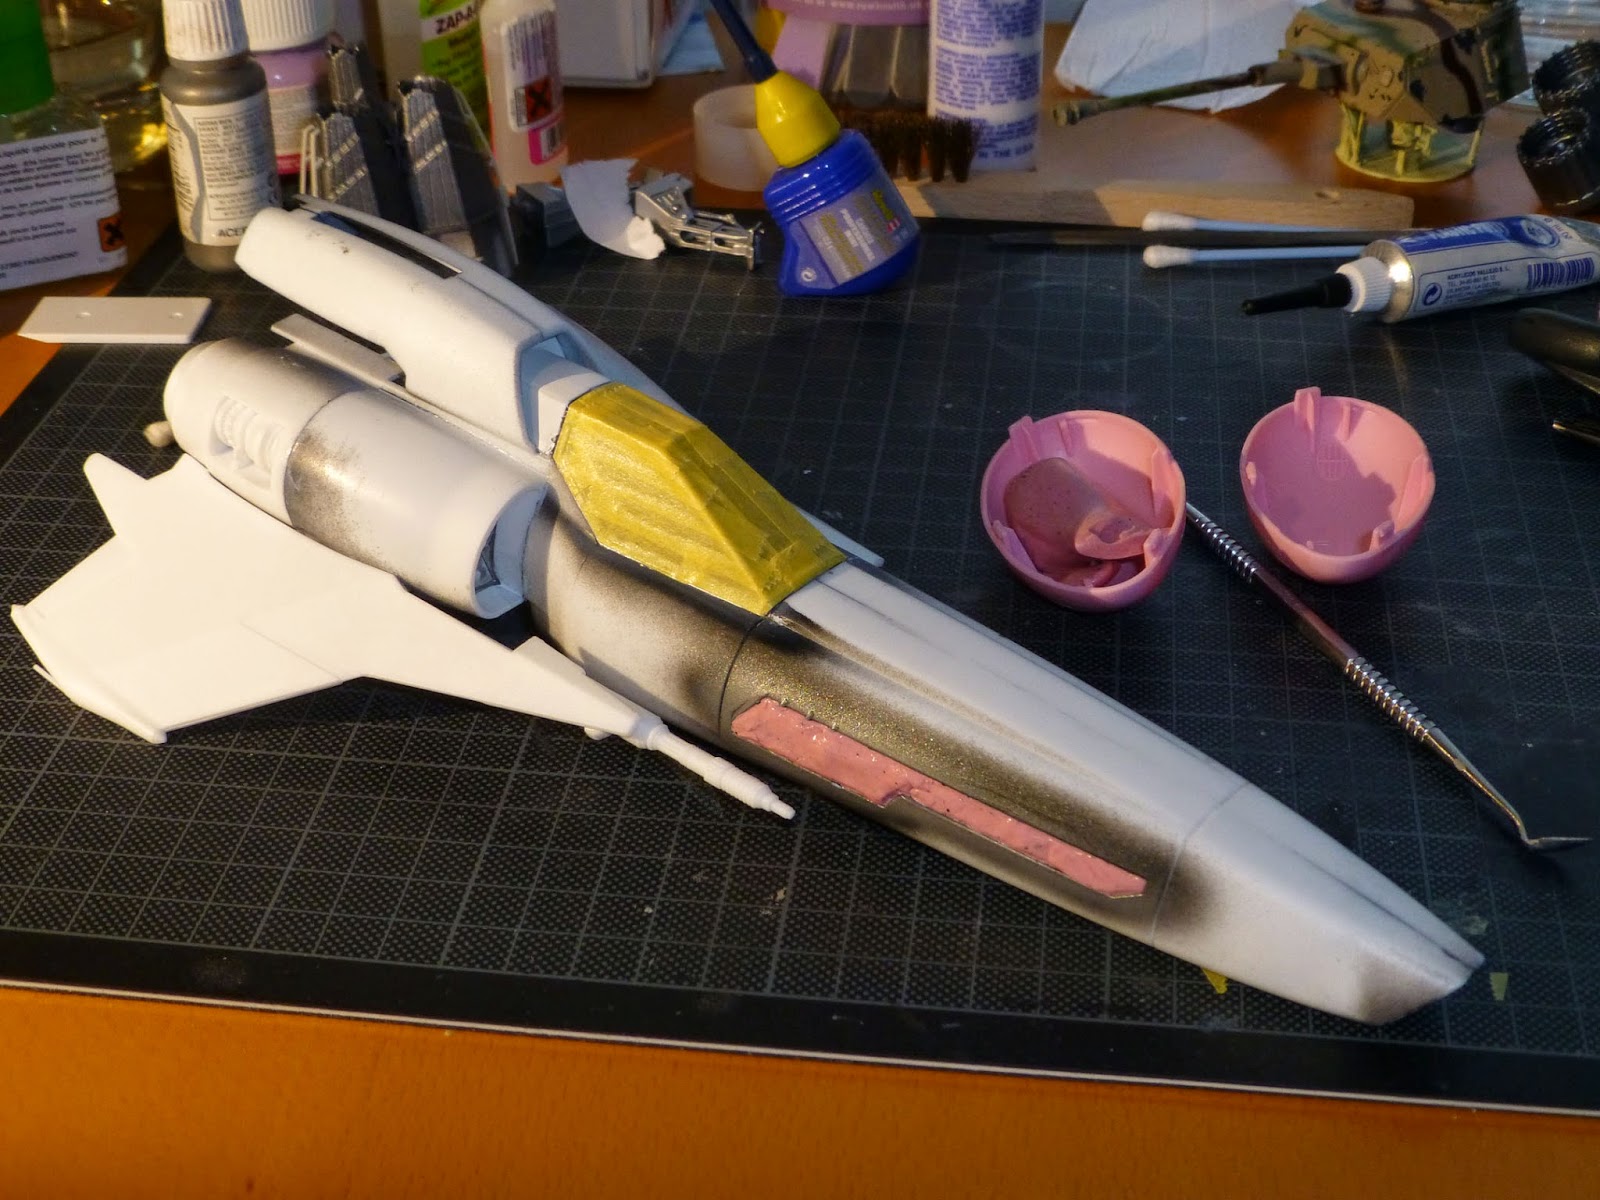
Once the cockpit was firmly attached, I masked it again and masked other pre-painted areas with silly putty. Pink really looks good on this Viper.


Usually, when I haven't used the airbrush in several months, it's because something had failed (or clogged) and I'm not anxious to tackle the encountered problem. I've done the occasional rant about it being my best friend and worst enemy, so I'm happy to announce this time that the past few airbrushing sessions went without a hitch.
I've been experimenting with Vallejo's flow improver, but I haven't reached a definitive conclusion. At first glance, it does seem to alleviate some paint flow issues, which shouldn't really come as a surprise, but it's always nice to see a product do what it's supposed to.

The Mark VII has been primed in black, because it's going to be metallic grey/blue-ish. The Mark II is white, so out came the dreaded white primer, but it went better than I feared. The main thing I learned since the last time I used it, is patience. I'm not a terribly patient man, but I've learned that my normal amount of patience hadn't quite cut it in the past.

You'd think it'd be easy to learn to go slow, but it's taken me a long time to go REALLY slow. The black primer only requires 2-3 layers. I've become almost fully resistant to the reflex of pulling the airbrush trigger too far back and to try to get complete coverage in one go. It will bite you in the ass if you want to go too fast. The white primer you see in the picture below is many many layers, added over 3 sessions. The pre-shading is only now starting to disappear a bit, but the result so far is smooth and thin. Too much paint would have started to run, create an uneven coat, or - worst case - obliterate detail.

The Mark VII is ready for it's base coat, so some mixing and experimenting will be up next. The Mark II needs some more assembly and a lot more white paint.

Question to you all : if a model is gonna be entirely white, can you just paint it with white primer and leave it at that, or does it pay in some way (smoother finish?) to go over it with more regular, non-primer white?


Monday, 14 July 2014

Post-shading and blending everything

Airbrushing sessions are going rather well these days and seem to be following each other in rapid succession. Maybe it's the weather, maybe I'm counting the days until we go on vacation (4 more days). Best not to dwell on it, in case we jinx it.

I wanted to do some post-shading, because last time, the green layer went on a little too heavy. With a slightly lightened version of the green, last time's smaller nozzle and some extra thinner to keep it all flowing, I slowly attacked the centers of all (well, most) panels. I soon realized it wasn't light enough, so I added some white. Still not enough, added some more, but the paint started flowing more slowly.
Long story short, by the time the thicker paint had left the nozzle and the easy-flowing mix was spraying again, it was TOO LIGHT and I had to add more green. Grmbl-mbl ... I messed up a few of the panels, but all in all the result is adequate and it was a good lesson in patience for next time.

Next up : blending it all together. The green is too sharp against the grey, so I decided to give another try at misting it all over with a very fine coat of grey. Remembering a tip one of you guys gave in a comment to an earlier (failed) attempt, I used 10 parts thinner to 1 part paint. It sprayed nicely but the result was negligible. 5 parts thinner to 1 part paint and we were slowly building opacity.

Everybody always has the same to say about this technique : "If you think it needs one more pass, STOP!" I can agree wholeheartedly, having just taken it 1 or 2 passes too far. I have no idea how further varnishing and (subtle) weathering will influence the colours.

Oh, and I broke off one of the forward antennae. Easy fix, no biggie.
Below is the before and after. Next step : masking for the red and black area's.


Sunday, 13 July 2014

Second colour is down

Masking is done with silly putty, because it easily conforms to the contour of the kit, can be shaped anyway you want and is incredibly easy to remove afterwards. The gaps in between are filled with masking tape. I prefer to use regular painter's tape where possible, because it's a lot cheaper per meter than the Tamiya tape.
Then again, the Tamiya tape is THE best tape for straight lines. Regular tape doesn't burnish down as well and paint is more prone to bleeding under the edge.


After the problems last time painting the panel centers (I'm sure you noticed the huge overspray), I decided to give the smaller nozzles on my Aztek another try. I have been experimenting with them in the past, with mediocre to bad results. They're not intended for acrylics - according to the manual - but how else will I do some finer work?
Past experiments always ended with a non-spraying nozzle, requiring several minutes each time to get it going again. I'm not known for my patience, so those experiments were quickly halted. Many months later, I may try again, as was the case yesterday.
To prevent clogging I thinned the paint really well (even though Vallejo is supposed to be usable unthinned) and gave it a go. It was actually too thin to cover the panel centers up close, because the paint was spidering away, but from a longer distance, it worked remarkable well and kept on spraying for the entire session. A victory in one field, but it does mean there's no recognizable shading in the green area.

I'll try to fix it with some post-shading (i.e. going over the panel centers in a slightly lighter version of the paint) and follow up with a very thin coat of the grey misted all over to blend it all together. This is a widely used method to remove contrast between camouflage colours, but something I haven't been able to pull off yet. I'm feeling confident though, so wish me luck ...


Friday, 11 July 2014

Chinook - Time for paint

It took  a long time, but the Chinook-project has reached the painting stage. After getting the canopy in place, I added all the fiddly bits, like antennae, searchlight and stuff I know neither function nor name of.

Some decisions:
  • I left out parts 32 at the tail because I couldn't find it on any reference photo's and they just looked wrong. 
  • I omitted part 23 because it was badly molded and would just look like an ugly lump at the back of the tail.
  • I attached parts 31/38 upside down (also missing on reference photo's), because I'm stupid or blind. The instructions were clear, but I must have had a short circuit in my brain.
Anyway, the only thing left to do was mask up the windows, because after all that work I spent on the interior, I did not want to ruin it with black primer flying through the windows onto my seats.
I settled on cutting pieces of plastic (roughly octogonal) until they fit in the openings and attached them with Maskol (Humbrol's liquid masking stuff), easily removed when painting is done (at least, that's the intention).


Out came the trusty black Vallejo primer for a nice coat of "Don't I look awesome and fierce!?"


I decided to do some panel shading, just because I hadn't really done it before. I always follow the reasoning behind it - breaking up monochrome plastic, accentuating panel lines - but had yet to really try it out. Inspired by several articles/posts/blogs and pushed over the brink by a recent post of Doog's, I tried filling in the panels first, then going over it with a diluted version of the same colour.


I dare say the result so far is looking okay, but we'll know more when the other colours have been added to the model. The colour nuances are actually a lot more visible with the naked eye, not quite getting captured on camera. We'll see how this evolves...


Sunday, 4 May 2014

Free-hand airbrushing - hit and miss

Ever since I started airbrushing (a year and a half ago), my ambition was to try free-hand camouflage. My first airbrush (Revell) was not suitable for this, so I kept masking with silly putty and getting good results. It kept nagging at me though. Now that I have an Aztec, airbrush control has greatly improved, so I really wanted to try it again.

The trick to free-hand airbrushing is to set the pressure really low, get the tip of the airbrush really close to the model and go very slow. This has proven rather easy for post-shading panel centers in a lighter colour, but that's always with slightly lighter paint than the base coat, so overspray is invisible and you keep adding until the result is satisfying.


Camouflage colours tend to contrast highly with the base coat, and the overspray is very visible. I already demonstrated this last time, when I did the turret.

This time, I tried to go even slower and though I'd best achieve that by thinning the heck out of the paint. Basically I filled the airbrush with thinner and added 1 drop of brown paint. I experimented with thinner (both the old and new Vallejo thinner) but ended up settling for the matt varnish, which seemed less likely to make the paint too runny and create those beautiful spiders we all hate to see on our models.


Initial results where promising : because the paint is so thin, overspray is far less visible. You have to go over the same spot a dozen times, but it does feel more "in control".


The difficult part now is to find the sweet spot between "thin enough" and "not too thin". The airbrush is finicky and will occasionally stop spraying. The instinct to pull the trigger back further is hard to resist, because when you do and the paint starts flowing again, it will be too much and then you get the aforementioned spiders.


I ended up respraying the entire thing again with the base coat. I'll try again ... later.

Purely as an experiment, I have succeeded and made some clear progress, but again I find myself struggling to find the balance between all those different variables that make airbrushing not always as easy as you'd like.

Sunday, 2 March 2014

Panzerjäger - Major SNAFU

The idea was to paint the entire model in "German grey", then use the "hairspray technique" with AK's chipping fluid (as I did earlier with the M48's scissor bridge), go over with the sand-coloured base and green/brown camouflage, then start (gently) chipping away.

HOWEVER ....
  1. The chipping fluid was spraying iffy today. It sprayed on very weird, widely known as "orange peel"-effect.
  2. Free-hand airbrushing, even with the finest nozzle my Aztec has, still gives an insane amount of overspray.
Let's address this last one first. I used the paint unthinned and dialled the pressure to the absolute minimum of around 7-8 psi. With the finest nozzle, I brought the airbrush in really close (about 1-2 cm). I could draw a relatively fine line on a piece of paper, but on the actual model it was rather difficult to 1) keep the paint flowing and 2) draw a line or curve at the same time. 
On the model, there is overspray AND the paint tends to run away. I can only guess that on paper it's easier, because paper absorbs some of the moisture, whereas a hard surface will produce spatters (albeit very small ones). This close up, the pressure seems still too high, as the paint runs away in tiny little spiders, but I can't get it lower than this. The only thing to do is move the airbrush further away, but can you guess what that does for the overspray? Correct!

Anyway, below is the result of my first free-hand camouflage airbrushing session. I'm not sure which parameter to play with to make it better. The green is okay-ish, but the darker the colour, the more obvious the overspray becomes.


On to issue number two. Compared to last time, the chipping fluid wouldn't spray very well, resulting in it going on the model way too heavily. I used 4 different nozzles, but couldn't find an acceptable way of spraying it. I'm guessing I'll need to do something to the fluid itself, i.e. thinning it.
I only realized how heavy the "hairspray" layer was until I started chipping. As soon as the surface became too wet, the paint started to wrinkle. When poked with a brush, the entire layer of paint came off like a snake shedding it's skin.


That's not chipping, but STRIPPING!


On the basket, it's easy enough to remove all the paint and start over, but on the turret I did not fancy doing that, with all those tiny pieces attached. So, I bit the bullet and very carefully chipped away some of the paint. Less is more, when it comes to the amount of water you're using.

The result is .... meh, good if you want to show how this chipping stuff works, but also illustrates it's easy to go overboard with it. I don't want to redo the turret, so this is how it'll be.


I had already sprayed the entire kit with the chipping fluid, but only painted the turret and basket. Seeing the results, I think I'll just give the entire kit a nice bath to remove the chipping fluid and start over, but more carefully.