Showing posts with label Colonial Viper. Show all posts

Saturday, 25 April 2020

Viper - Finished!

And here's the final result, on both the Mark II and mark VII.

Started in August 2014 and abandoned several times along the route. Finally finished early 2019.

Kit(s): Colonial Viper Mark II and VII
Scale: 1/32
Manufacturer: Revell & Moebius
Price: $25 and $40
Number of parts: ~60 and ~50
Time spent: ~40 hours
Project completion time: 5 years


Paint: (Vallejo)

Mark II
  • White primer - entire model (10+ layers)
  • US Grey (71.047) - cockpit
  • Aluminium, steel, gold, silver ... - details
Mark VII
  • Black primer
  • Base colour was trial and error mix of
    • 35% Pale grey blue (71.046)
    • 35% US grey (71.047)
    • 20% Insignia blue (71.091)
    • 10% aluminium (71.062)
  • Black, aluminium, steel, gold, silver, ... - details
Other products:
  • Alklad II klear kote (semi-matte)
  • Abteilung 502 oil
    • 180 - Copper oxide blue
    • 070 - Dark rust
    • 050 - Olive green
    • 060 - Light rust brown
    • 215 - Flesh shadow
    • 160 - Engine grease (brownish)
    • 510 - Starship filth (dirty green)
    • 170 - German grey highlight
Findings or issues:

  • Not sure you can call it an issue. I misplaced some of the smaller inserts, like for the nose of the Mark VII.
  • The front landing strut on the Mark II was warped, but nothing a little hot water couldn't fix. Nowaday's, I would use a heatgun, but I didn't have one back then.
  • The Moebius building instructions leave somewhat to be desired, but the Revell instructions can be found online.
  • The Moebius cockpit could do with a few more decals. It's pretty bland in there now.
  • Red decal stripes on Revell's Mark II are a bit short to cover the entire length. You'll need to match the paint color and do touch-ups. (Humbrol #19 is a perfect match)

I took these pictures outside in bright sunlight. I only spotted afterwards that the models have collected quite an amount of dust in the year they've been in the bookshelf already.
More and better quality pictures will be in the Facebook album.


Thursday, 23 April 2020

Viper - Part 8 (Oil paint weathering)

Would you believe, it's been FIVE years since I last updated you about the Colonial Vipers?
I had to doublecheck a few times before I could believe it myself.

This is one of my on-again/off-again projects, where I just loose interest for 1 or more years.

One of the last photos of the construction phase I wanted to share was to illustrate how easy it was to perfectly align the landing struts on the Mark VII.


On the the topic of today : oil paint weathering. I used 2 completely different techniques on the 2 Vipers.

Sludge wash

We're now talking october 2015, about 8 months after the previous photo.

The Mark VII was treated with an overall sludge wash. This is the same technique I applied to the AC130H. (weathering-with-oils).

The photos speak for themselves.


Dot filters

Fast forward to may 2018, two and a half years later.

I heard and read about this dot-filter technique and watched some videos online. More specifically, the videos from Foxx on emodelsuk on this exactmodel. (Most prominently : this fragment)
I was finally ready to try my hand at it. I bought a set of Abteilung 502 oils and some odourless turpentine (you can also use mineral spirits or "White Spirit", as we call it at this side of the pond).


For my first attempt, the "dots" were waaay too big and the result was an oily sludge. It started to look a lot more like technique #1.

The big advantage of these oils, is that you can (almost) completely remove them again with a rag dipped in white spirit. It helps that I used a semi-gloss (you could call it "satin") varnish before I put on the decals and another layer to seal them in.
On a matte surface, it's harder to remove all of the oils.


A second, more subtle, attempt with smaller dots and repated application yielded more of the result that I had planned and hoped for.


The result will be better visible when I post the final pictures in the next installment.

Saturday, 7 March 2015

Viper - Part 7 (Decals)

After 2 layers of Alclad II varnish, it was time for decals. On the Mark VII that was done quickly, on the Mark II it was a whole other story.
Don't get me wrong. The Revell decals are sturdy AND flexible. Where needed, they respond extremely well to setting solutions (I use Microscale  Micro Set & Sol). There's just so many of them ...

The tail stripe is broken up in many pieces. Rather cleverly, each piece has no more than 1 irregular shape to conform to, making it a lot easier to get them in place. Below a picture of an almost finished stripe, just missing a small horizontal strip (and one on top of the tailfin).


After applying your preferred setting solution, wrinkling (shown below) may occur. Do not worry: it will go away again, UNLESS you can't resist touching it, or the decal wasn't entirely placed straight in the first place. It pays to go slow and not rush through the many decals.


I mentioned the clever tail stripe design? I can tell future makers of this kit to pay extra attention to the horizontal part. Make sure both the lower and upper parts of the stripe have a little extra to help cover this gap, otherwise you end up with the result below!


How to touch-up these parts? The 2 Vallejo bottles of red I have don't match the color of the decals, so I was dreading having to mix and match paint to cover this mistake, but then I remembered I still have a LOAD of Humbrol/Revell paint, bound to contain the right shade of red.


Bingo! Humbrol #19 (Gloss bright red) is a near exact match. The bottle is over 20 years old and a gooey mess, because the oil has separated from the pigments. But some stirring and some added white spirit yielded more than enough to work with. The result is more than satisfying.


Before and after.


The 2 sisters, side by side, ready for another coat of varnish, then on to some decent weathering.


One small setback. While doing the decals on the Mark VII, I noticed a huge and ugly seam line over the tailfin. No idea how I missed it so far. I should really go over the entire model with more attention befóre I start painting. Oh well, these models have gone back to the spraybooth so many times already, one more session won't hurt.


Saturday, 21 February 2015

Time flies

I can't believe 4 weeks went by without any post. It's not that I've done nothing, but certainly not as much as I would've liked.

Where were we?

  • The patriot radar truck was being painted.
  • The Vipers had been painted and needed a coat of varnish.
  • I had finished the photo-etch on the Panzerjäger.
  • The Chinook was "finished" late september, but requires some light weathering.
  • The castle hasn't been touched since november, when I did some experimenting with oil paints.
Do you feel the disadvantage of not being able to focus on one kit?

So, if I haven't done nothing the past month, what HAVE I been doing?

Patriot Radar

Painting was finished, the entire thing was varnished and decals have been applied. The building instructions only mention where to place 15-20 decals, but many more are provided on the decal sheet. I guess I went a little crazy creative.


Vipers

The Vipers both needed just a coat of varnish, before decaling. Because the Mark II is going to receive many big decals, I sanded the entire body extra smooth (Tamiya sanding paper, 1200-2000 grit) before I started with varnishing.
I've been experiencing issues with spraying the Alclad II varnishes lately, but if I thin it 50/50 with white spirit (or "mineral spirits") it sprays perfectly, more controlled and levels smoother. It does require at least 2 layers however.

The Mark II has been giving me troubles. First the paint lifted after I masked off the side engines. Then when everything was smooth and done (again), I dropped a big blob of glue on it when attaching the nose gear. Some harsh words could have been heard ...


Panzerjäger

With the photo-etch done, I primed it black, added a layer of chipping fluid, then the sand-coloured basecoat. I'm doing both the plastic and PE version to see if all the extra PE- trouble is really worth it in the end.


Chinook

I finally convinced myself to finish the Chinook. I started with a very fine layer of AK dust effects, because I want to make the black and red less "in your face". The dust managed to creep under some of the decals, distorting the intended effect somewhat. I'll add another layer of matte varnish, then do some darkening aft of the exhausts. (and also some dust over the rotor blades)


Also some light dust effects on the Patriot truck, if you can spot it, near the bottom of the side thingies (fuel tanks?).


Tuesday, 6 January 2015

Viper - Part 6

The 2 Vipers are reaching the end of the painting stage at roughly the same time. For the Mark VII that meant 2 coats of black primer, followed by the blue-grey base-coat (see previous post). For the Mark II it was some basic pre-shading, then about 15-20 layers of white primer.

I'm now at the point where I inspect the 2 models to detect blemishes (like dust particles in the paint, which need to be sanded away) or parts needing touch-ups. After that they will receive a clear coat to protect the base coat and prepare for decals.

I found minor seam-imperfections on both models. On the Mark VII, I fixed it by sanding away the paint, using extra filler and repainting. On the Mark II, I do not want to redo all those layers and the problem happens to be on top of the nose, where it will be hidden by the red stripe. That settles it for using decals or not. I had half planned to paint the stripes, but going to give the decals a try.


Sunday, 28 December 2014

Viper - Part 5 (Base coat)

Last time, I primed the Vipers. Now it's time for their basecoat.

For the Mark II, the white primer coat IS the base coat, but I've hit a snag with the tail-section and it requires more filling and sanding before I continue.
The Mark VII was primed in black, which has 2 reasons. One, it's super-easy paint (easier then the grey and white primers I have), which covers the model beautifully and makes further painting a breeze. Two, it's the basecoat for pre-shading.

The 2 pictures below illustrate my current method without the need for words. Matt over at Doog's models calls it "Black basing" and you can find his detailed explanation here.

Super-simplified, it goes as follows :

  1. Prime the model in black
  2. Fill in all panel centers with the basecoat. (first picture)
    Don't cover the panels too evenly.
  3. Go over it with a thinned version of your basecoat (second picture), to blend the panels and the remaining black "panel lines" and unify everything.
    Important : stop painting 2 or 3 passes before you think you'll reach adequate coverage, or the contrast will be gone. It's easier to add another layer later, than to regret going too far.
The result is a not as monochromatic than if you were just slapping on an entire coat in the same colour and colour density. It's only the second model on which I try it, but I'm liking the results.


Friday, 26 December 2014

Viper - Part 4 (Back at the bench)

Finally vacation! Time to kick some postponed projects in high gear. Lack of posts does not mean lack of progress, although I admit it's going slow and the number of hours at the workbench are fewer than I'd like.

All the minute photo-etch details have been added to the Panzerjäger's turret skirts, but that project has temporarily made way for a renewed intrest in the double Viper build, abandoned somewhere in august.


I messed up the Mark II's cockpit a bit, with some overenthusiastic aluminium overspray on the inside. I'm not even sure how I managed to do that. I wetted a cloth with some airbrush cleaner, and with a little persuasion the paint came off. Not all of it, but enough to make it presentable again. I then sealed it in several layers of Future.

The cockpit was attached with canopy glue, something I picked up at the hobby shop on a recent shopping spree. It requires force to be exerted while drying and is best left alone for 24 hours to fully cure. (The bottle says 3 hours before "handling", but safe trumps sorry anytime)
I used to same stuff to fill the large gaps around the canopy, because the fit left a lot to be desired. It's thick enough to fill big gaps and cleans up easily with a wet cotton bud. It dries as good as transparent, so any excess glue that oozes out on the inside of the canopy should hardly be visible. 


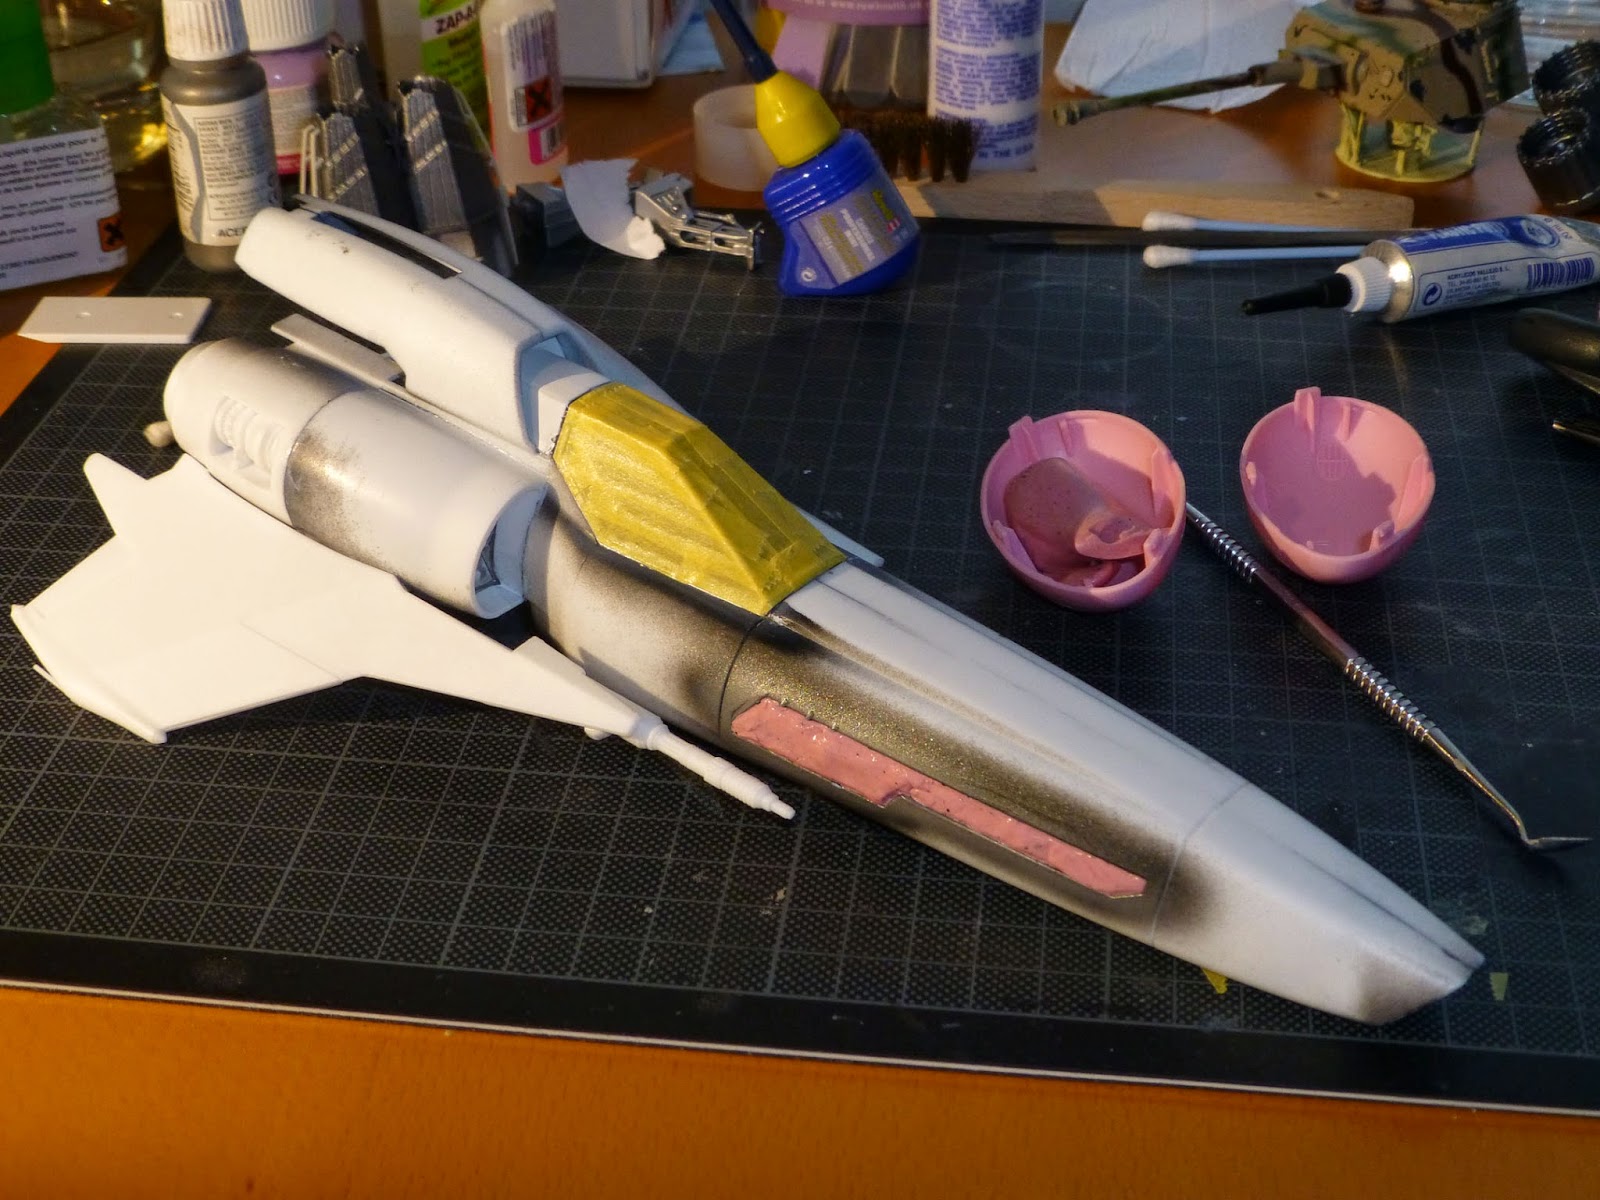
Once the cockpit was firmly attached, I masked it again and masked other pre-painted areas with silly putty. Pink really looks good on this Viper.


Usually, when I haven't used the airbrush in several months, it's because something had failed (or clogged) and I'm not anxious to tackle the encountered problem. I've done the occasional rant about it being my best friend and worst enemy, so I'm happy to announce this time that the past few airbrushing sessions went without a hitch.
I've been experimenting with Vallejo's flow improver, but I haven't reached a definitive conclusion. At first glance, it does seem to alleviate some paint flow issues, which shouldn't really come as a surprise, but it's always nice to see a product do what it's supposed to.

The Mark VII has been primed in black, because it's going to be metallic grey/blue-ish. The Mark II is white, so out came the dreaded white primer, but it went better than I feared. The main thing I learned since the last time I used it, is patience. I'm not a terribly patient man, but I've learned that my normal amount of patience hadn't quite cut it in the past.

You'd think it'd be easy to learn to go slow, but it's taken me a long time to go REALLY slow. The black primer only requires 2-3 layers. I've become almost fully resistant to the reflex of pulling the airbrush trigger too far back and to try to get complete coverage in one go. It will bite you in the ass if you want to go too fast. The white primer you see in the picture below is many many layers, added over 3 sessions. The pre-shading is only now starting to disappear a bit, but the result so far is smooth and thin. Too much paint would have started to run, create an uneven coat, or - worst case - obliterate detail.

The Mark VII is ready for it's base coat, so some mixing and experimenting will be up next. The Mark II needs some more assembly and a lot more white paint.

Question to you all : if a model is gonna be entirely white, can you just paint it with white primer and leave it at that, or does it pay in some way (smoother finish?) to go over it with more regular, non-primer white?


Friday, 15 August 2014

Viper - Part 3 (Cockpit decals)

Everything going in the fuselage - or requiring paint before further assembly - is painted. Both cockpits are USA Grey (Vallejo 71.047). The pilot's uniforms are camouflage green (71.022), with a few drops of the grey, to make it a little more dull.
The landing gear for the Mark II is aluminium and for the Mark VII is steel. The difference is only caused by me misreading the instructions too quickly. I found some nasty seams on them anyway, which had to be sanded smooth. I'll be redoing them aluminium as well.


Cockpit decals
The cockpit for Revell's Mark II has a very nice amount of decals. Moebius' Mark VII has ONE! The Revell version of this kit has a lot more decals, but I'm not going to spend money in obtaining them.


Pilots
The pilots just needed a bit more detail. Grey boots and gloves (German grey - 71.052), a black belt and joystick and a golden helmet with silver visor (not yet done).
While looking for a new bottle of black paint on my workbench, I stumbled upon an old but unused bottle of  "Black glaze" (70.855). I obtained it in a big batch of Vallejo paint from my brother-in-law's stash of unused paint and kept it out of curiosity.
Unsure of the difference between (and inexperienced in the use of) glazes, washes and plain heavily diluted paint, I gave it a try on one of the pilots. Heavily diluted in a first layer, it looked awful until it dried. The (old) Vallejo thinner I used is white and dries clear(ish), but looks weird at first. Once dry, I could see the purpose of this glaze. A second layer went on less thinned. See below for the difference between the treated and untreated pilot.


Cockpit assembly
The Mark VII cockpit-pieces fit perfectly, but the Mark II pieces have a lot of wiggle-room in their assembly, so to prevent it from not fitting inside the fuselage once assembled, I glued it all and sandwiched it in between the fuselage halves. This way, fit is perfect and I can let the glue set with everything in it's proper position.


Here are both resulting cockpits. I added a little painted detail to the Mark VII, because that one lonely decal didn't do the cockpit much justice.


Once the pilots are done, everything will receive a coat of varnish (to seal in and protect the decals) and the fuselages will be closed.