Friday, 2 January 2015

Sprue Cutters Union : Old dog, new tricks

2015 has come and with it the long-anticipated rebirth if the Sprue Cutters' Union. In short, a bunch of modelling related blogs writing about the same topic once a month. (More info about the union here.)

- What New Products/Techniques Will You Purchase/Attempt This Year? -

I'm not sure about trying new techniques the coming year. How about we get a proper handle on our current techniques first?
2014 hasn't been an extremely active year at the bench, so this year I would like to simply start by trying to be more active and producing a higher quality of models then up until now.

Being scared to "ruin" a model with a new technique is a bad excuse, but one I'm prone to using too often. Ruining a model only costs you the price of the model and a bunch of hours. Those hours are not truly wasted of you learned something, right?

Let's make this my 2015 resolution : dare to try more.

Fighting monochromaticity

Pre-shading, post-shading, black basing, ... whatever you want to call it or in whichever order you apply your layers, I will be trying to add a lot more colour variation in my work. I gave it a first try on the Chinook, but obliterated much of the shading with subsequent layers of paint. I'm now trying to do it a lot more careful on the Viper Mark VII.


Oil paint

Filters, washes, streaking, ... many people swear by oil paints, because they can be manipulated (or removed) for hours and hours, as opposed to quick-drying acrylic paints. I was finally persuaded to try it and bought a bunch of oils from Mig Productions. I experimented lightly with it on one of the castle walls, but it's time to suck it up and attack a real model.


Chipping

Also something I've dabbled with in past and current models. My first try was relatively nice, the second model turned into a disaster which I'm still recovering from (i.e. hesitant to re-tackle). I will give this a new go in the coming months.


Even though the year has just started, some of my fellow bloggers have already jumped on board the SCU carousel with their contribution:

Sunday, 28 December 2014

Viper - Part 5 (Base coat)

Last time, I primed the Vipers. Now it's time for their basecoat.

For the Mark II, the white primer coat IS the base coat, but I've hit a snag with the tail-section and it requires more filling and sanding before I continue.
The Mark VII was primed in black, which has 2 reasons. One, it's super-easy paint (easier then the grey and white primers I have), which covers the model beautifully and makes further painting a breeze. Two, it's the basecoat for pre-shading.

The 2 pictures below illustrate my current method without the need for words. Matt over at Doog's models calls it "Black basing" and you can find his detailed explanation here.

Super-simplified, it goes as follows :

  1. Prime the model in black
  2. Fill in all panel centers with the basecoat. (first picture)
    Don't cover the panels too evenly.
  3. Go over it with a thinned version of your basecoat (second picture), to blend the panels and the remaining black "panel lines" and unify everything.
    Important : stop painting 2 or 3 passes before you think you'll reach adequate coverage, or the contrast will be gone. It's easier to add another layer later, than to regret going too far.
The result is a not as monochromatic than if you were just slapping on an entire coat in the same colour and colour density. It's only the second model on which I try it, but I'm liking the results.


Friday, 26 December 2014

Viper - Part 4 (Back at the bench)

Finally vacation! Time to kick some postponed projects in high gear. Lack of posts does not mean lack of progress, although I admit it's going slow and the number of hours at the workbench are fewer than I'd like.

All the minute photo-etch details have been added to the Panzerjäger's turret skirts, but that project has temporarily made way for a renewed intrest in the double Viper build, abandoned somewhere in august.


I messed up the Mark II's cockpit a bit, with some overenthusiastic aluminium overspray on the inside. I'm not even sure how I managed to do that. I wetted a cloth with some airbrush cleaner, and with a little persuasion the paint came off. Not all of it, but enough to make it presentable again. I then sealed it in several layers of Future.

The cockpit was attached with canopy glue, something I picked up at the hobby shop on a recent shopping spree. It requires force to be exerted while drying and is best left alone for 24 hours to fully cure. (The bottle says 3 hours before "handling", but safe trumps sorry anytime)
I used to same stuff to fill the large gaps around the canopy, because the fit left a lot to be desired. It's thick enough to fill big gaps and cleans up easily with a wet cotton bud. It dries as good as transparent, so any excess glue that oozes out on the inside of the canopy should hardly be visible. 


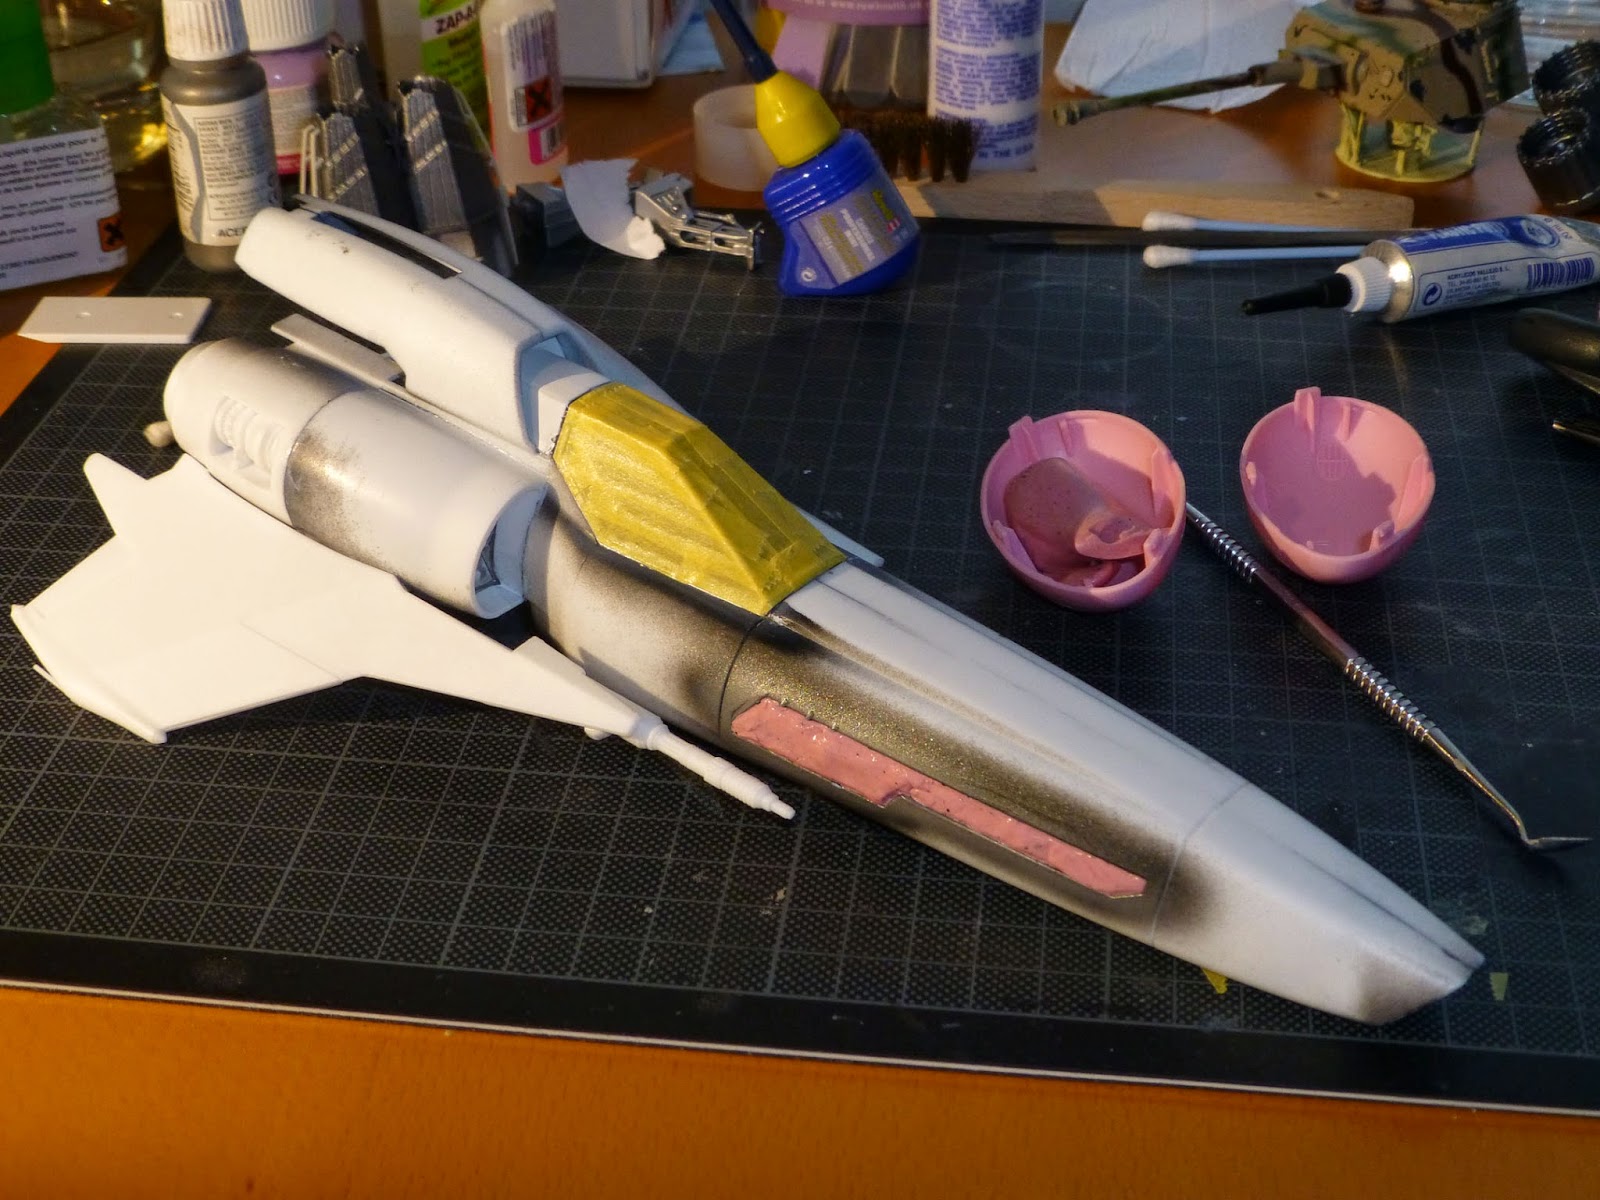
Once the cockpit was firmly attached, I masked it again and masked other pre-painted areas with silly putty. Pink really looks good on this Viper.


Usually, when I haven't used the airbrush in several months, it's because something had failed (or clogged) and I'm not anxious to tackle the encountered problem. I've done the occasional rant about it being my best friend and worst enemy, so I'm happy to announce this time that the past few airbrushing sessions went without a hitch.
I've been experimenting with Vallejo's flow improver, but I haven't reached a definitive conclusion. At first glance, it does seem to alleviate some paint flow issues, which shouldn't really come as a surprise, but it's always nice to see a product do what it's supposed to.

The Mark VII has been primed in black, because it's going to be metallic grey/blue-ish. The Mark II is white, so out came the dreaded white primer, but it went better than I feared. The main thing I learned since the last time I used it, is patience. I'm not a terribly patient man, but I've learned that my normal amount of patience hadn't quite cut it in the past.

You'd think it'd be easy to learn to go slow, but it's taken me a long time to go REALLY slow. The black primer only requires 2-3 layers. I've become almost fully resistant to the reflex of pulling the airbrush trigger too far back and to try to get complete coverage in one go. It will bite you in the ass if you want to go too fast. The white primer you see in the picture below is many many layers, added over 3 sessions. The pre-shading is only now starting to disappear a bit, but the result so far is smooth and thin. Too much paint would have started to run, create an uneven coat, or - worst case - obliterate detail.

The Mark VII is ready for it's base coat, so some mixing and experimenting will be up next. The Mark II needs some more assembly and a lot more white paint.

Question to you all : if a model is gonna be entirely white, can you just paint it with white primer and leave it at that, or does it pay in some way (smoother finish?) to go over it with more regular, non-primer white?


Saturday, 13 December 2014

Zubr class LCAC - new tool, wrong scale

About a year ago, I reported falling in love with the Russion navy's Zubr class LCAC (Landing Craft Air Cushion), but unfortunately the only existing kit was Dragon's 1/700, hard to find and stupidly expensive on Ebay for some reason. I wasn't really impressed by it anyway.

In the december 2014 issue of FSM (Fine Scale Modeler) a Zubr was listed in the new product section. At first, I got really excited, but this too turned out to be 1/700 scale. While this may be a nice scale for many ships, for this kit it results in a model of about 8 centimeter (3 inch).
Now, if this were available in any scale rendering a model around 30 centimeters (one foot), I'd be throwing my money at it.

This resin kit from Gwylan models includes photo-etch, decals and a paint mask.
It's very nice looking, but in my eyes more suitable as part of a larger diorama, than as a stand-alone model. Still a kick-ass hovercraft, though!


Friday, 12 December 2014

(Life's) work in progress - Trainstation

Not my work this time, but definitely worth mentioning here. This is the work of the chairman of our local IPMS chapter.

He's been working on it for over a year, about 3-4 hours a day. The models are done, the impressive base is finished. It "just" needs to receive a load of figurines and some animals.

As this huge 1/35 diorama will probably only be seen by this evening's meeting attendees and - once finished - it's one time appearance on our next annual convention, I thought I would share it would all my viewers (all 42 of you :-)).


Daddy's workbench - part 2

A little over 2 years ago, when I had just started this blog, I wrote that daddy's workbench also serves other purposes then making scale tanks or airplanes. Many of our tools can also be used to repair toys.

It started simple, with some simple wood glue to fix a Bumba puzzle, but my recently acquired skill of soldering (and the acquisition of the needed tools for it) has enlarged the range of possible repairs.


This little teacup's lid's handle had broken off, but wouldn't stay on with glue. A little tin (well, a lót actually) and a hot solder iron solved this, not only in mere seconds, but also for eternity. Unless, maybe if you drove over it with a truck.

Now, thát's a happy teapot, and - by the time school ends today - one over-the-moon toddler.


This Hello Kitty watering-can slash annoying-noise-maker has broken before and was fixed with CA glue. It wouldn't stay fixed, so I used a recent free sample of Loctite two-component glue. Fingers crossed ... (and yes, I have a little girl, how did you guess?)


Saturday, 29 November 2014

Photo-etch - Part 3

One of the advantages (or maybe disadvantages?) of having a blog, is that you can retrace your progress, or lack thereof. Turns out I haven't seen the airbrush in at least 2 months. My head is full of ideas on how to proceed on multiple ongoing projects, but somehow I'm stuck in the idea phase and not actually doing anything. I should add procrastination as a major skill.

I attached the last PE parts that required soldering and am now slowly adding all the minute details with CA glue. I clearly have a misconception on how long it takes for CA glue to cure. "Mere seconds" - as is described on the bottle - should be interpreted as "several minutes". I just made it a new habit to browse the web or catch up on mail and Facebook after attaching a part, so I do not mess things up because it's still wet.

Below the as-good-as-final result, next to the plastic version.


If I say tiny, I mean TINY!


There are 20 large rivets and 60 little ones. They are supposed to go over all the indentations in the larger PE-parts, but I think I'll only place the large ones. (The smalle ones are all on the inside of the ring anyway, so much less visible.


Picking up small PE-parts (or plastic ones for that matter) is a hassle. If you dare to use tweezers, they are bound to fly away, never to be seen again. A wet finger seems to be the general way modellers pick up the tiniest parts, but I wanted to try something else.

I've read about these little sticks with low-tack surface for exactly this purpose, but it seems like a waste of money. I tried making one myself by cutting the point of a cocktail stick and dipping it in Humbrol Maskoll (or any other latex-based product). Repeat after 5 minutes and again and again until it looks like a teardrop. It's tacky enough to pick up small PE parts, but not too much, so you can position the picked up part into a small drop of glue on it's intended destination.


Tuesday, 11 November 2014

Photo-etch soldering - Part 2

Last february, I did my very first attempt at soldering photo-etch parts on some scrap photo-etch. I reported that it was fairly easy and that I would "experiment more later and report my findings".

Well, 9 months definitely counts as "later" as we go into round 2 of the experiment. I decided to up the ante and go from scrap to actual photo-etch parts. Nothing like actual, ruined-of-you-mess-up parts to raise the stress levels a bit.


Finally time to break out the photo-etch bending tool that's been sitting on my desk for over a year. I must say, this tool is fantastic and provides precise and controlled bends. It was a bit pricey, but cheaper alternatives are available, for as low as €15.


The soldering itself is a technique to be practiced a lot, so it should go better the more I do it.
Not all photo-etch parts require this. In fact, more often than not, the photo-etch for your model kit wil be stand-alone pieces, to be bent and attached to the plastic model with CA glue. This kit, however, has an entire photo-etch assembly, consisting of over 50 parts, which stand to benefit greatly from the super-strong bond that soldering provides. It ain't always easy though ...

Below are a few pictures of the result of about 3 hours trial and error, swearing and rejoicing. I assembled the plastic counterpart in a few minutes and used it to check positioning and get the curve right for some of the larger parts. Just like any other new technique, there's a learning curve to this. Not burning your fingers, was a quick, easy lesson.
The larger parts are actually rather easy to join. The fact that the bond is strong as soon as you withdraw the iron is almost amazing. The smallest details however really tested the limit of my patience.

In the second picture below, you can see the 4 tiny hinges with which the panels are connected to eachother. Each is about 1 by 3 mm (roughly 3/64" by 1/8" unless my math is off) and a real pain to handle, let alone attach. I must have attached and removed them at least 10 times, before giving up and resorting to CA glue. When that ALSO failed to succesfully bond the parts, I considered leaving them off, but I pushed through with a last attempt to solder them and in the end settled for a mediocre result.


I punched 2 holes through the front part (with a hammer and a small nail), which should line up with the larger damage on the turret. It's basically 2 places where the paint chipping got out of hand because I used too much chipping fluid and too much water (another technique I'm just starting to get the hang of). I'm hoping the holes in the armour will create the illusion of several hard hits and look realistic.
Another advantage of photo-etch thus seems to be it's easier to make it look like damage metal, because it IS metal.


The thing I'm really looking forward to is getting both the plastic and photo-etch parts primed and painted. The paint should hide all the discoloration and scratches (from filing away excess tin). The whole idea of this longer-than-intended experiment is to see if all that trouble is worth it in the end. Will that photo-etch assembly look better than the plastic one or only marginally so?

Next time I will attach both pieces together. Again this requires 4 hinges, so wish me (and my fickle nerves) a lot of luck.

Sunday, 2 November 2014

First time oil paints

I recently became quite intrigued by the use of oil paints for adding filters, streaking and what-not. I have read about these techniques often, but was hesitant to take the plunge.
The main incentive came from Foxx's video from eModels.uk, you can find it here.
He was building and weathering the Colonial Viper which I also happen to be building and his explanations are very thorough.

I found a webshop in the Netherlands (not so easily actually) that sold Mig's Abteilung 502 oil paints and ordered a variety of colours. Today I decided to try and add some streaking to the castle's raised walkway. It's still drying and will probably change somewhat when a matte layer is added later.


Castle progress and future

After all the washes and wooden parts and more washes, here are the intermediate results. The gatehouse and the main keep are as good as done, except for some 20 more window shutters.


When my good friend and colleague, loyal blog-follower and fellow AD&D-player Nick announced he was taking a roadtrip through the US, an idea started to develop in the back of my head. It took a few days before I realized the potential and I asked him to see if he could find a Walmart and bring me some "Future" (currently known as "Pledge Multi-Surface Floor Finish") as it is unobtainable in Europe and costs way too much to have it shipped over.

If you have no idea what future is, you must not be a modeller, but suffice to say it's one of the most widely used products for glossy finish or general varnish in the modelling world.
Main reasons for using it are it's excellent levelling qualities (no brushstrokes), as a protective layer before (and after!) decals and the fact that it's many times cheaper than the Alclad varnishes I've been using so far.

Flash forward a few months, upon Nick's return, a shiny bottle was sitting on my desk. The bottle says "Tile & Vinyl floor finish", but some research and inquiry tought us this is the 2011-incarnation of the same product. The bottle must have been sitting on the shelves for some time, but it has no expiration date and this quantity should easily last the remainder of my modelling career.


Some people airbrush future, some swear by handbrushing it. A little hesitant to put this in my airbrush, I decided to do some first applications with a normal brush. Below is the front and back of the raised walkway as a before-and-after.
Applying the future was super-easy and it indeed levels very nicely. The finish is very glossy, but that's a good thing if you want to apply panel-line washes (the glossier the finish, the easier the wash finds the little details). Gloss can be removed afterwards with a matte varnish or dullcoat.